
For the month of October I thought it would be fun to do some halloween nail art tutorials. Tutorials isn't something I do, like ever. I might have two tutorials on this blog, but I decided to give it a shot and I made a video tutorial as well as a picture tutorial for these gravestone nails.

The video & picture tutorial are featured after the jump!

The polishes I used are OPI Skull & Glossbones, OPI French Quarter For Your Thoughts, OPI Jade Is The New Black, Zoya Jolie, and Pure Ice Black Out
You will also need crumpled up saran wrap, a medium length striper brush, and I also used another striper brush that I cut down to make it thinner.
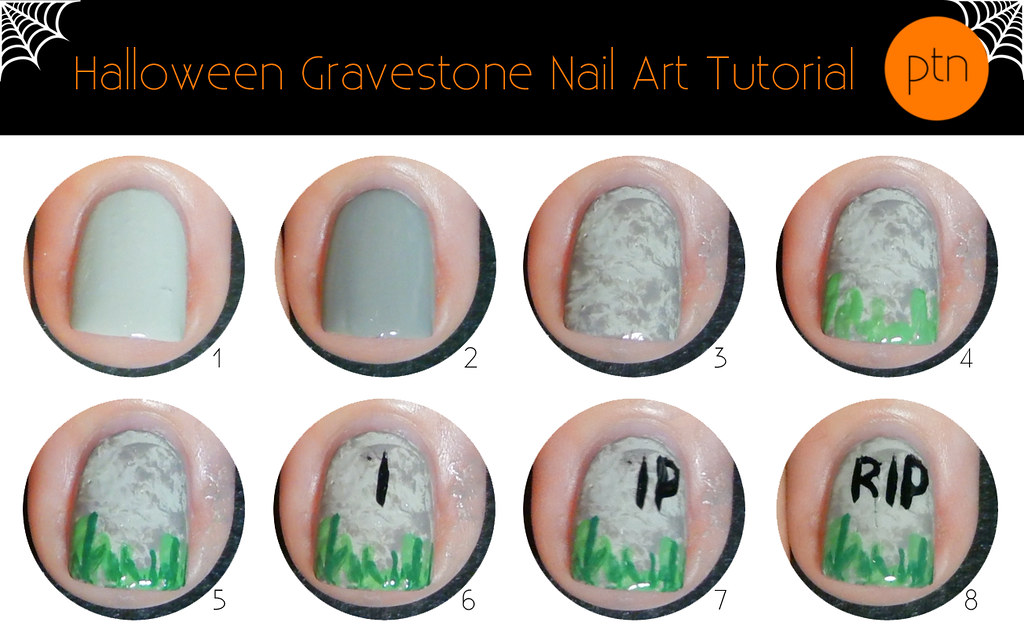
1. Paint you nails with OPI Skull & Glossbones and wait for it to dry completely
2. After that has dried, paint your nails with OPI French Quarter For Your Thoughts
3. Quickly take your saran wrap and dab away at the wet polish
4. Take your medium length striper and use Zoya Jolie to paint some lines at the tip of your nail
5. Take that same brush and use OPI Jade Is The New Black to add more lines and add dimension
6. Take the thinner striper brush and and begin the lettering. I started with the "I" to make sure the design is centered.
7. I then painted the letter "P"
8. Next I added the letter "R"
After that just top it all off with your favorite topcoat and you're done! :)
And here's the video:
Bear with me, this is my first video tutorial so I'm still trying to figure everything out, but I think it's good for my first attempt regardless.
I hope you all enjoyed this tutorial, let me know if you would like to see something like this in the future. :)
No comments:
Post a Comment